


Can You Find Three Errors with this Dryerbox® Installation?
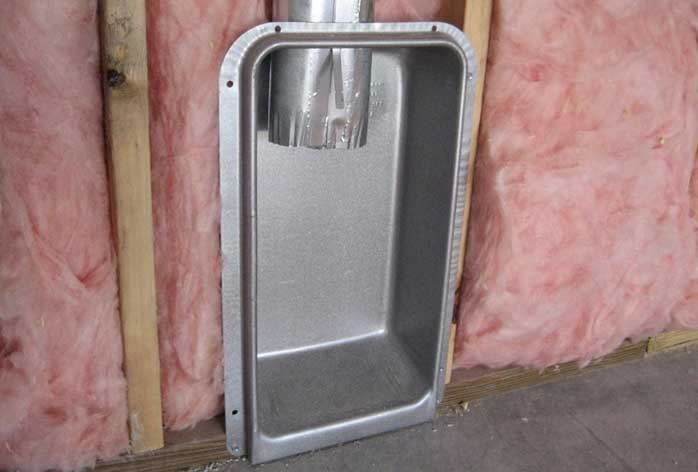
OK. Nobody likes to read directions. When installed correctly, however, the Dryerbox delivers some important benefits and makes for a very professional looking finish. While this installation looks, at first glance, like it's going well, there are three important errors that don't let the Dryerbox do as good a job for the builder and homeowner as it could. If you haven't already spotted them, then we recommend that you check out the installation instructions for the model that fits your project.
For a cheat-sheet view of how this installation can be improved, check out the images below.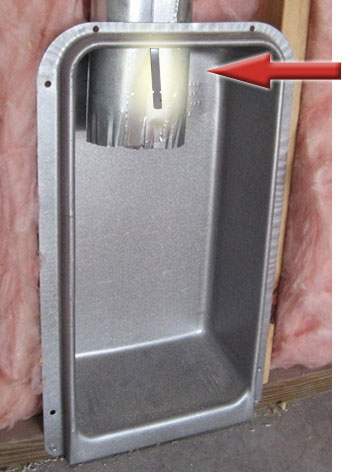
Forgot to Use the Duct Tab
The duct tab is designed to support vent pipe so that it does not fall too far into the Dryerbox port. This tab should have been bent into a "J-Hook" prior to inserting the pipe. Once the duct is secured in the wall, the tab can be broken off so that the transition hose can be properly attached to the pipe. See this link for a quick description of how the duct tab works.
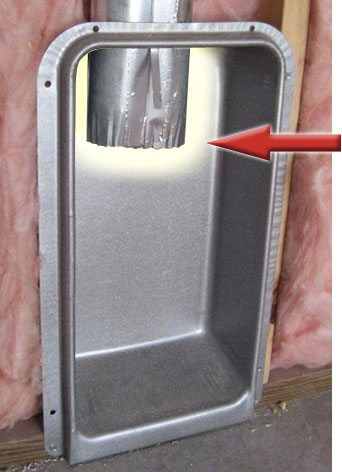
Pipe Protrudes Too Far
If the duct tab had been used, the pipe would have protruded only two inches into the Dryerbox. When the pipe extends further into the Dryerbox, it doesn't allow enough space to collect an adequate length of transition hose. If a shorter length is used, it makes it difficult to get behind the dryer to attach flex exhaust hose between the dryer and the duct pipe.
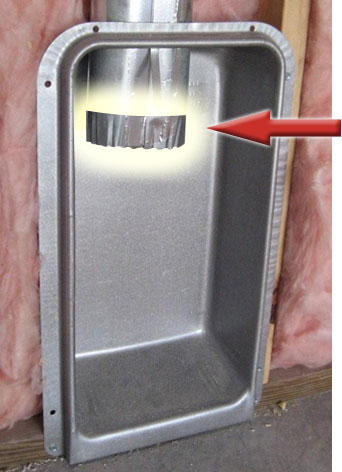
Crimped End Facing Wrong Direction
To prevent lint build up inside the duct run, the crimped end of the pipe should always point away from the airflow source. Flex hose is designed to fit (very snugly) around the smooth end (see this video for flex hose tips). Lint would collect in the ridges, creating a fire hazard, in the installation shown here.