


Your retrofit dryer vent box (4") was just the ticket I needed to gain much needed clearance in my laundry room. Before, I had to pull the dryer out an additional couple of inches in front of the washer, because I was collapsing my [vinyl] hose. Over time, we kept inching the dryer back for more space, which kept leading to longer and longer clothes drying time. You sort of forget not to do that over time.
The last straw was when the dryer was taking way too long, and I took the dryer apart thinking I may have a heating element going bad, or a clogged vent tube. I did clean my (thru the roof) dryer vent with a 10 ft. brush/cable arrangement sold for doing that sort of thing, and got out 2 or 3 handfuls of lint. That tool actually worked quite well until you get to the bends in the tubing (of which I have 2 or 3). But the real problem was not the dryer... I completely disassembled it and cleaned it, cleaned the vents, and quickly realized that it must have been the vinyl tubing was just too squished to be an effective vent.
I decided to set my vent box on top of my trim, because I didn't want to cut up the trim, and my dryer measured 4" from the bottom of the outlet, and the trim was only 3.25" high. This proved to be just barely enough, as the difference between the two gets taken up with hoses, angles and what-not.
When it was all finished, the dryer now sits as far back as the washer, and I am able to install semi-rigid pipe (which I also bought from you), and have no real bends, except a radiused 90 that maintains it's inside diameter well.
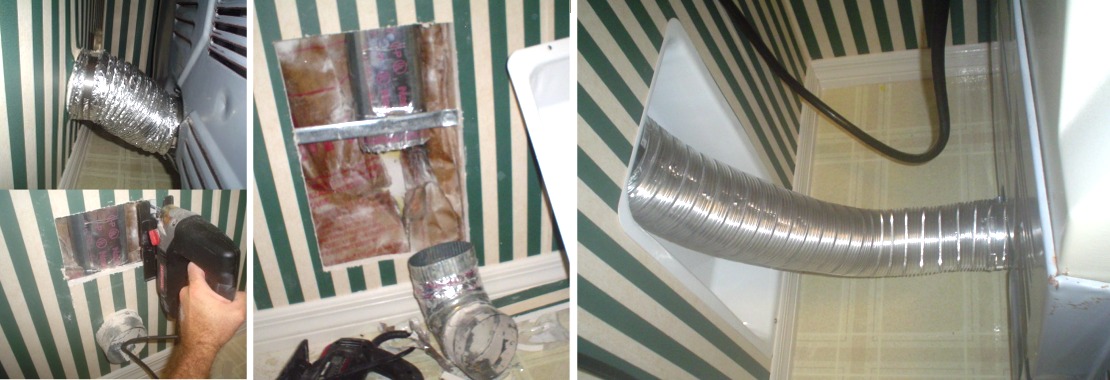
I found a few surprises along the way... 2 straps of metal holding the pipe in the wall from moving. One I cut out with a metal cutoff wheel in a drill, and the other I just wiggled the pipe back and forth until it broke the tape, since it was much higher up in the wall than my hole. Another surprise was that I already had an oval tube in the wall. It still required massive crimping. The long reach duckbill needle-nose pliers (from Harbor Freight) worked great for crimping and straightening back out the vent tube.
To have something to screw into at the bottom, I screwed a piece of 2x4 roughly as wide as the wall hole to the framing at the bottom of the wall inside. Then I added another 2x4 to the top of that. The second 2x4 had to be cut down in a table saw to end up flush with the bottom of the wall hole. Then I ran 2 stainless screws thru the dryer box into the 2x4 that I added.
A drill with a very thin cutoff wheel works slick, and the wheel and mandrel can be had for probably $5 at harbor freight. This allows a drill to be used instead of a dremel, which has way too small of a cutoff wheel. You would probably go thru many of those expensive little wheels cutting the vent tube. The bigger cutoff wheels last a lot longer, and cut faster. I used maybe 1/3 of 1 disc to cut thru the pipe. Be sure to caution though, that these wheels can explode if they get cracked or bent and you run them high speed. Some safety goggles probably wouldn't hurt either, even if it’s just to keep the abrasive dust out of your eyes. I also used a grinding stone bit in the drill to deburr the sharp edges when I was done. This came in handy later, when it came time to crimp, so I didn't cut up my fingers!
While it did take me nearly an afternoon to do a nice job of installing this thing, it was just the solution I needed. I’m so happy with the new arrangement, and feel much safer now too! I got rid of dryer fire potential, fixed my dryer spacing problem, and lowered my energy use all in one shot. Very nice product, sir.
Steve H. HomeownerOcala, FL